
Technology: Use OneNote Like a Pro
- Admin
- Feb 9, 2017
- 3 min read

How to Use OneNote Like a Pro
1. Sync Notebooks Online
Saving notebooks to your local computer is basically using OneNote like a glorified Notepad. To take real advantage of OneNote’s features, you must save and sync all your notebooks online. Syncing updates your notebook across all your devices in real time. This means you can create a new note on your home computer before heading out to work and resume using it on your laptop at the office.
But how exactly do you sync online?
Starting with Office 2013, OneNote actually prompts you to log into SkyDrive – Microsoft’s cloud storage solution – to sync notebooks automatically. Sharepoint and Dropbox can also be used for syncing; just make sure to select the appropriate folder when creating a new notebook.
You can also change sync settings to manual or automatic under Sync Options in the Info panel under the File menu (OneNote 2013). The default setting is automatic; we suggest you keep it as is.
2. Take Audio/Video Notes
Typing notes into OneNote can get awfully tedious. Spice up your routine by taking audio and video notes instead. Click on Insert -> Record Audio/Record Video to start taking notes.
This is a more visual, interactive way to keep track of things – a solid alternative for when you get sick of typing things out. Plus, you can usually speak faster than you can type (unless you are Jack Nicholson!), so you’ll probably save some time as well.
But to take real advantage of these notes, you must first let OneNote index your audio/video recordings. This will enable you to search through your audio/video notes just like any normal written message – a powerful feature for finding information.
To do this, go to File -> Options -> Audio & Video and select Enable searching audio and video recordings for words.
3. Organize Your Notebooks Effectively
OneNote is meant to be used as a physical notebook replacement. The program is most effective when you organize your notebooks like you would in the real world – that is with individual notebooks for each subject/topic, separate sections for each sub-topic, and separate page for each note or groups of similar notes.
Most beginners tend to be very conservative with notebook and section creation. Don’t be; you don’t stand to lose anything save a few megabytes of space for each new notebook. Create as many notes, pages, sections and notebooks as you like; it’ll make organization that much easier.
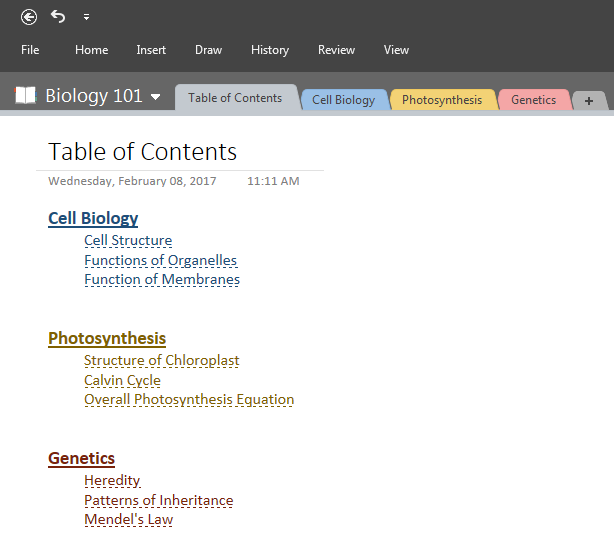
For example, if you are a college student, you can make a new notebook for each class you take in a semester. You can then make separate sections for each broad topic and add pages of notes for each day of the class. You can see an example structure below:
4. Use OneNote to Make To-Do Lists
Still using pocket legal pads and post-it notes to make your daily to-do lists? OneNote offers a much better solution. Make a to-do list in the program by pressing CTRL+1 anywhere in the main note screen. OneNote will automatically create a list item with a checkbox next to it. Type in your list item, press enter, type in another item, and so on.
To cross-off an item on the list, simply click on the checkbox or bring your text cursor to the list item and press CTRL+1 again.
5. Take Advantage of Page Templates
Not many people use it, but OneNote page templates can be incredibly useful when done right. This is especially true for college students, as OneNote 2013 comes packed with dozens of thoughtful templates right out of the box.
To access these templates, go to Insert -> Page Templates, and choose a template from the panel that pops up on the right.
Using templates makes note taking even faster. You can also save your current page as a template by clicking Save current page as template in the Templates panel.
6. Use Tags
One of OneNote’s most powerful yet underutilized features is tagging. Tags work like hashtags in Twitter; every note or item marked with a particular tag will show up in the search results when you search for that tag.
To use tags, click on any of the built-in tags under the Tags section in the home ribbon.
You can also make your own custom tags in this section.
Use tags to organize your data. For example, you could mark important document with the Important tag, questions with the Question tag, and so on. Use keyboard shortcuts to tag items faster.
You can also change the search options to include the current section, the current notebook, or even all your existing notebooks in the Find Tag panel.
As you can see, this is a very handy feature for organizing your information. Combined with custom search, it can help keep you from losing anything ever again.


Comments